Showing posts with label compost. Show all posts

Thursday, July 9, 2015

Thursday Snapshot: Soba (buckwheat) in the Garden

Soba going strong between the board path and the old potato bed.
It has been a busy month of reading for me. I reviewed a copy of Elizabeth Murphy's Building Soil for Permaculture Magazine (subscribers will see it first, so I won't give anything away except to say read it) and read Gary Nabhan's Growing Food in a Hotter, Drier Land for another project I'm currently working on. Both were inspiring and action-packed (in a farmy-gardeny sort of fashion) and, as often happens, had a direct impact on my work in the garden.

Murphy recommended soba (buckwheat) as a cover crop for its rapid growth, attractiveness to pollinators, and because it pulls phosphorous up from the soil. (Phosphorous is handy for photosynthesis and other growing abilities that plants have.) It grows densely, too, which means weeds have a hard time joining the party. Buckwheat's lovely white blossoms attract pollinators who will also hopefully have a wander over to the cucumbers shortly thereafter.

So, I planted some soba. The plan is to enjoy it while it lasts, pull it before it goes to seed, and leave it to decompose in place. The potato bed is an active compost heap now that the potatoes are gone, so I'm experimenting with a few different ideas. My plan is to turn it into a bed for greens come September. We'll see what happens.

Monday, June 22, 2015

Reprise: Getting Started with Vermicomposting

This article first appeared over at ecowaza.com, a lovely little website where I wrote a regular column for a handful of years. It is the second part in a series on vermicomposting (composting with worms) covering how to get started and using the lovely materials provided.  - JB

Photo courtesy of James Kemp.
Budding vermicomposters can make their own bins or order a kit from a variety of sources. Kits usually include a container, worms, and plenty of instruction and support needed to get comfortable with your new little helpers.

Bins can be made from plastic storage containers where holes have been drilled in the bottom or constructed from scrap wood for a custom-made fit and look. The possibilities are only limited by your imagination, the materials at hand, and the space available. 

Do your research.
James Kemp, importer of Australia's Can-O-Worms composter, says a little reading goes a long way when it comes to vermicomposting. They are, he says, living creatures.

“It's important to read the manual, and there is plenty of advice and info on the internet,” he said. “The failure rate is for beginners is fairly high, though” said Kemp. “People don't follow the instructions or they feed them the wrong food."

Worms Eat My Garbage by Mary Appelhof (Flower Press, 2003) is a charming guide to vermicomposting offering tips on building your own to long-term management and problem-solving. 

Websites like Kemp’s (Japanese only) and Can-O-Worms offer plenty of useful advice and contact information if a vermicomposter runs into trouble. Other sites such as UNL and OneMore can fill readers in on the joys of vermicomposting.

A Few Things to Keep in Mind
Vermicomposting is relatively easy, but there are a few things to avoid and some best practices, too, to keep worms healthy, happy, and composting.

  • Choose the bins location carefully. Worms don’t like extremeness in temperature, so find a slightly sheltered place on the balcony or in a garage for the bin. “You need to be aware of your environment. Worms don't like to get too hot, so if your worm farm is in direct sunlight all day during summer, then they will almost certainly die” warned Kemp.

  • Don't use insecticides or sprays around your worm bin. Worms are quite sensitive to chemicals, even those commonly used for cockroaches or dani. If you must use these items, then remove the worms and wait until returning them to the environment.

  • Don't use garden soil as bedding for the worms. It may seem logical, but garden soil is an unpredictable medium for the worms. 

  • Don't be afraid of visitors. After you've had your worm bin established, you may notice other creatures besides the redworms, especially if you keep your bin outdoors. Most of these are beneficial because they help breakdown the materials. These helpful creatures include springtails, sowbugs, pill bugs, and millipedes. 


Remember, vermicomposting is a great way to reduce household waste and turn it into something your plants will love. Have fun!

Monday, June 8, 2015

Reprise: Vermicomposting or One Option for Composting in the City

First of a two-part series that first appeared over at Ecowaza.com, a sweet little online business with an eco-bent that I used to write for. They're taking a bit of a break at the moment, but are worth watching for and checking out when the time comes.  - JB

Photo courtesy of James Kemp at Grege.com
Compost is a gardener’s best friend. The dark loam made from decomposed kitchen waste fuels healthy soils, brings helpful microbes, bacteria, and insects to the garden along with plenty of nutrients that plants need. Yet, organic urban gardeners, especially those able to grow only in containers, can find compost a challenge. Often, there is no backyard where a compost bin can be tucked, just a balcony or tiny patio. What to do?

Enter the worm.

Most people only think of worms as the little wiggle on the end of a hook meant to invite fish for dinner. Yet, worms do a great deal of the heavy-lifting that keeps soil healthy and fertile. Gardeners who find these slimy squigglers know worms are a sign that their soil is in good shape. It also turns out that worms are the urban grower’s composting ace in the hole, er, bin.

Vermicomposting uses worms, usually red wigglers, to make compost. Kept in a small box called a vermicomposter, the worms munch away on kitchen scraps (no meat or dairy, thanks). As they eat so they poop, and the resulting worm humus or worm castings are rich in nutrients that plants adore. According to the University of Nebraska-Lincoln Extension, “compared to ordinary soil, the worm castings contain five times more nitrogen, seven times more phosphorus and eleven times more potassium. They are rich in humic acids and improve the structure of the soil.”

For urban residents, vermicomposting is a real boon according to James Kemp, owner of Grege.com, and importer of Australia’s Can-O-Worms vermicomposting system and a devoted vermicomposter since 2007. 

“The great thing about vermiculture for urban composters is the cleanliness, ease of "operation" and the fact that it can be done in tiny spaces. The Can-o-worms unit, for example, is only about 60cm in diameter, so it will fit onto most apartment balconies. So long as you follow a few easy steps, the worms are quite happy to be left alone if you have a trip out of town or are away for a while, they don't need a lot of attention. If the worms are happy and the environment inside the Can-o-Worms is running as it should be, then there is also no smell or unpleasant odor.”

Peo and Satoko Ekberg, sustainability consultants, use vermicomposting as part of their One Planet apartment scheme. The worms that live on their balcony helped reduce their home garbage dramatically.

Vermicomposting is also efficient. Kitchen scraps turn into hummus in roughly three to four months. In the meantime, Kemp suggests enjoying a cup of “worm tea.”

“Worm composting is a great balance- your kitchen scraps turn into a rich compost within a couple of months, you get a daily supply of worm tea (liquid fertilizer) and it's easy to run, no fuss, no mess etc. The liquid run-off from the composter or the "worm tea" looks like a strong black tea and can be diluted with water and used on your plants. It's best to use it fresh. We have a bucket under the tap on our Can-o-worms and let it fill up naturally. Every day or two we'll empty it and use it to water the plants,” said Kemp in an email interview.


Inspired and intrigued? Good! Next week we’ll give you all the tips and ideas you need to build, buy, and manage your own bin. 

Monday, September 22, 2014

Vermicomposting over at Ecotwaza

Photo courtesy of James Kemp at grege.
I am a big fan of worms, and I'm a big fan of compost. So, it was with great pleasure that I penned this month's piece at Ecotwaza about vermicomposting. Thanks to James Kemp at grege, importer to Japan of the Can-O-Worms vermicomposter,  for his lovely interview and photos, too!

Monday, August 4, 2014

Compost: How to use compost

Happy impatiens with their compost home.
Even if growing space is tight, a compost bin can make a big difference to a garden. It is well worth setting up, whether homemade or a snazzy purchased one, for the benefits it offers. It means less garbage to the landfill, which also means fewer purchased garbage bags. It means less potting soil, and it definitely eliminates the need for inorganic fertilizers. (These are made from petroleum products, which are not healthy or delicious for the soil or the grower.)

Compost can be used in containers as well as in the garden as a mulch, as a soil additive, and as a tea. It brings life giving microbes and other creatures to plants and places in the garden that may be in dire need. It provides hearty nutrition for plants, which in turn makes them healthier and disease-resistant.

Spread a layer of compost around established garden plants for a nutrition boost. Top it with standard mulch (straw, grass clippings, or weeds with their roots turned up to the sun) for weed suppression that also feeds the soil, retains moisture, and helps regulate temperature. A good fall practice is to spread a layer of it on the garden and top it off with leaves, straw, and a bit of manure. The compost will import microbes, fungi, and other critters who will help break down the layers into beautiful soil that will be ready for the spring.

Mix it in with soil before planting in the garden or in containers. The nutrition and life it brings will help support the plants throughout the coming season and beyond. Containers with a bit of compost added regularly will maintain a heathy level of nutrition throughout the season. It can also be added to old potting soil to rejuvenate it for the next growing season.

Compost tea is made by simply adding compost to water. Aerobic (oxygen-added) and anaerobic (non-oxygen) varieties exist. The latter requires a bit of effort and equipment, but makes a lovely beverage for plants who can absorb nutrients through their leaves.

Next: Composting and the urban gardener
Previous: Compost defined; How to make compost

Monday, July 28, 2014

Compost: How to make it

Our lovely compost bowl.
Second in a series on compost - what it is, how to do it, and how to use it. A special entry for urban growers will also be included along with a list of further resources.

Compost usually begins in the kitchen. A bowl lined with newspaper (carbon) gets filled up with vegetable an fruit scraps (nitrogen). This in turn gets transferred to a bucket also lined with newspaper on the porch. The newspaper provides carbon, but it helps absorb liquids, which keeps the bucket and bowl relatively tidy. The bowl is turned upside down to empty it and the newspaper lands on top to make a nice lid. This hides it from the watchful eye of our neighborhood crows and makes it less shocking for visitors.

The bucket in turn gets transferred to a bin near the garden. In Tokyo, my two bins were made of chicken wire and poles, which allowed air and water to move through freely. In Michigan, the bins were made of old pallets, which also allowed air and water to move through freely. Water and air are pivotal for the assorted creatures that will be crafting the compost. Water helps them travel within the pile and keeps them alive, just as it does the plants and the gardener, so they can do their work. Air, of course, is what these creatures breathe. Carbon - newspaper, leaves, twigs, cardboard, etc. - also helps with air and water flow in the pile. These chunkier items then create little pockets that allow creatures move about as they snack, but also allows them to find the oxygen and water they need to survive.

In Japan, round plastic green bins with lids are popular compost bins. These are tidy and attractive and relatively effective; however, their biggest problem is the lid. Water and air, as mentioned above, crucial for the survival of the decomposers, cannot enter if that tight-fitting lid is in place. Neighbors and gardeners alike worry about the contents getting smelly or attracting animals; however, a healthy, active compost bin shouldn’t smell. If their isn’t enough air and water, the activity becomes anaerobic. Decomposition will still occur, but alcohols (of which, according to Lowenfels and Lewis, one part per million will kill plant cells) will be produced. Take the lid off.

Animals may come, but in my experience in rural Michigan, Tokyo, and now Kanagawa, they have not been a problem. If the bin is smelly, animals will be attracted; however, most of them eat in place. Pigeons and other birds frolic and nibble, tamping down the contents and adding their digestive process to the contents. Other creatures may come, but they won’t stay. The garden and bin will be relatively active places, which makes them unattractive homes. If decomposition is going well, the pile should be too hot for comfortable living.

Next: How to use compost
Previous: Compost defined

Monday, July 21, 2014

Compost: A Primer

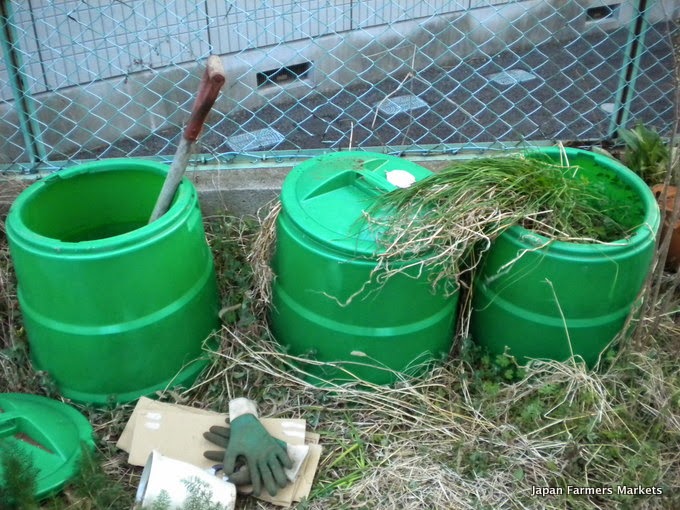
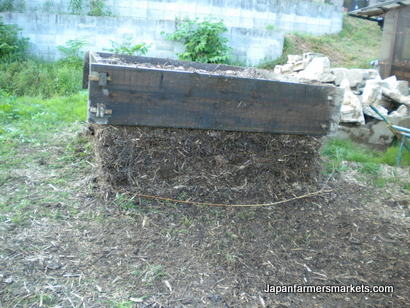
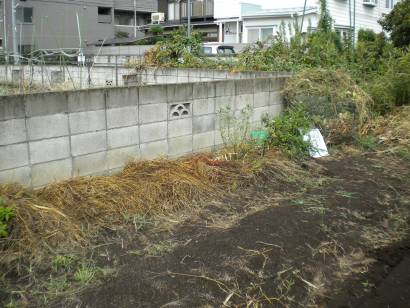
My compost bins when I arrived at our new place.
Compost is a gardener and farmers gold, and is probably one of the best things we can do for our planet much less our soil. Yet, for many gardeners it remains something of a mystery. The questions I often hear are: How do I make it? How do I use it? What exactly is so great about it? What can I compost? Here’s a quick primer to get folks started on making their own and putting it to good use. 
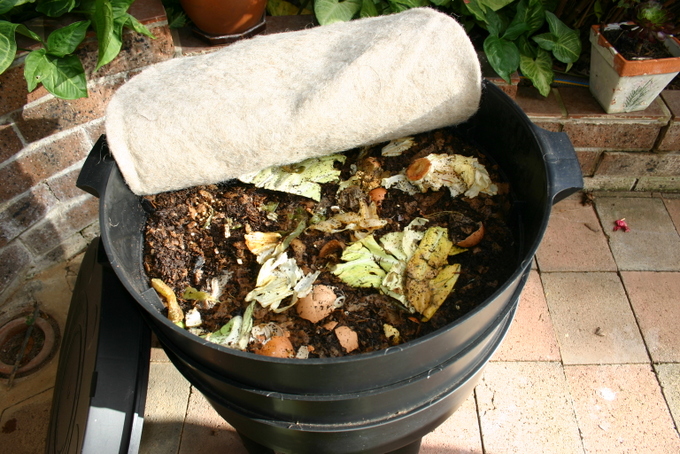
What is compost?

Compost is essentially a crumbly black soil-like material that results when organic matter (leaves, food waste, fish bones, coffee grounds and the filters, grass clippings, etc.) is broken down by assorted organisms living in the soil. The process tends to be rather slow, but like many good things, it is worth the wait. A teaspoon of compost, according to Lowenfels and Lewis in their classic, Teaming with Microbes, contains “up to a billion bacteria, 400 to 900 feet (150 to 300 meters) of fungal hyphae, 10,000 to 50,000 protozoa, and 30 to 300 nematodes.” While that might sound a little scary, it shouldn’t. Healthy soil is very much alive with all sorts of things that quietly go about their business, literally and figuratively creating the foundation for our lives. Compost also comes with other critters like worms as well as the assorted minerals and nutrients plants need to lead healthy, robust lives. (Here when I say plants I don’t just mean vegetables, but I’m also talking about trees, grass, flowers, shrubs, and herbs to name but a few.) It is a life-giving substance that teems with life itself. It is easily the best thing a grower at any scale can give to their soil and plants.
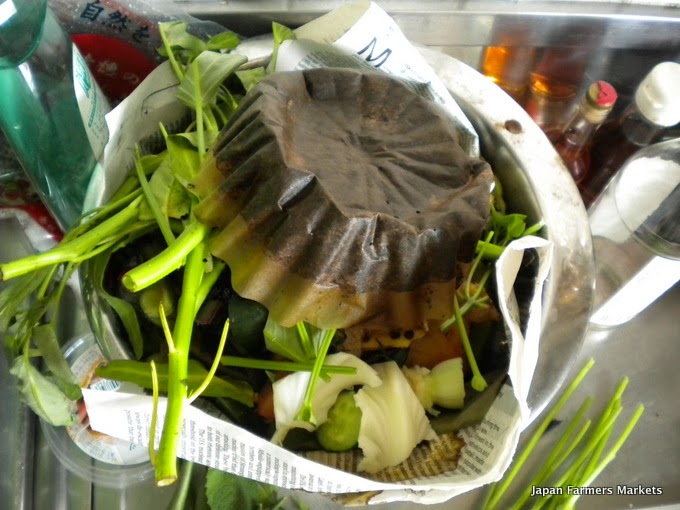
What to compost?

Technically, any organic material can be composted. This includes coffee filters, newspaper, cardboard, kitchen scraps, tea bags, paper plates, grass clippings, garden waste, and fish bits and bones. Old cotton and wool rugs and t-shirts, too, have found their way to my bin with good effect; however, it is worth noting that these were bins set in the soil. Certainly, there are those who would have a longer and a shorter list than that, but for my purposes these items work well. I do make certain exceptions at different times, such as using garden waste and grass clippings as mulch, but that is just another form of composting in a different place.

There is a great deal of talk about C:N (Carbon to Nitrogen) ratios in a compost pile that can seem intimidating to beginners. Carbon comes in the form of leaves, woody stems, momigara (rice hulls), soba hulls, straw, as well as newspaper and cardboard. This keeps the engines running, so to speak, of the decomposers in the soil. Just like runners before a race, the decomposers use the carbon in the soil to keep their energy levels steady. Nitrogen goes in as fresh grass clippings, kitchen waste, and urine. It helps the decomposers make the enzymes and proteins that let them process the organic matter.

If there is too much carbon, the microbes use up all the nitrogen and can’t produce the enzymes and proteins to break down the carbon. The breakdown process will slow down until the balance is restored. Too much nitrogen, and the microbes will focus on eating it and leave the carbon for later. A balance then, is needed to keep the system running.

Composting is an art as much as a science, so being overly fussy about how much of what goes in isn’t necessary unless the gardener wants it to be. Lowenfels and Lewis among others offer excellent advice on tailoring compost for specific purposes, such as trees versus vegetables versus grass, which is worth knowing but doesn’t have to be strictly followed. Gardeners should simply begin and see what happens.

Next: How to make compost

Thursday, June 13, 2013

Thursday Snapshot: Fish-shaped Soy Sauce Container

Bento soy sauce container.
Nara Prefecture, Japan
We spent part of a recent vacation visiting and helping out on a natural farm in Nara Prefecture. Kazuto and Erina Hamma of Hamma Farm were glorious hosts and teachers who we now think of as friends. I learned a great deal while weeding with them both, which left plenty of time for talking. They graciously and patiently answered the questions I incessantly peppered them with, including why fish-shaped bento soy sauce containers kept appearing under the tea bushes. It turns out that the organic farmer who worked the fields before them used the namagomi (raw garbage or compost)  to fertilize the fields. A few of these little guys made it through the sorting process.

Monday, June 3, 2013

Mita-san's Composting Method


One transferred compost pile!
A few weeks back we took a trip to help out on a natural farm in Nara Prefecture. Hamma Farm only needed us for four days, though, which left us with a tiny bit of extra time. We tossed around a few different ideas, and then decided to head down to Okayama once again and visit our friend Mita-san.

We'd gone down last year to see how he was doing after a year of farming and to lend a hand. We indeed got dirty working in his fields, but we also had one of the most wonderful experiences ever with he and his
family. It remains a highlight of our time here in Japan. Trying to recreate something so special  is risky, but since we had our farm clothes, boots and gloves it seemed logical to carry on just a little bit further south and help again.

Spouse 'dancing down' the compost.
Much to my delight one of our jobs during this visit was to turn Mita-san's compost. (I'm fully aware of how geeky that sounds.) Using a method taught him by a neighboring organic farmer, Mita-san constructs compost piles at various locations around his fields. (Like many Japanese farmers, his fields are not all together in a single piece of land but are scattered a bit hither and yon over the landscape.) Then as he needs or wants the compost, it's ready and available.

Starting with a frame, Mita-san alternates layers of leaves, twigs, and grass with healthy handfuls of momigara (rice hulls). As the layer builds up to about half the height of the frame, he walks on the contents to firmly press them in place. Once it's packed in, healthy handfuls of komenuka (rice bran) get liberally spread over the whole. Then the materials are thoroughly soaked before starting the process all over again. As the pile gains height, the frame is pulled up to allow for more stacking. The tight packing makes for a good friction fit so that by the end the frame sits about a meter or so high ringing the top layer.

Our job during was to turn a relatively young pile near his carrot patch where he was also experimenting with burnt rice hulls as a mulch and a soil warmer. Turned about every two weeks, the piles gradually break down into a lovely crumble of goodness that can be plowed into the fields, layered next to the plants as a mulch, or the main ingredient in a refreshing summer beverage for plants. Total time required to achieve this lovely crumble that in its final form stands roughly a quarter of the stacks original height is about three months.

Spreading the komenuka.
The pile we're dismantling is in the foreground.
The whole process of turning - setting the frame in a new location, transferring the materials, and layering - took two of us at least an hour. We learned quickly that packing the corners is pivotal to create a firm shape for the frame to ride up on, and that soaking helps activate the bacteria that break everything down. Most materials were still identifiable, a testament to the youth of this pile, but the interior of the pile was warm. Thin streamers of steam drifted up  into the cool early evening air, a sure sign that beneficial bacteria and microbes were busy feasting. It was a pleasure to lend a hand.

Tuesday, May 3, 2011

Compost Bin Alive and Well


We turned the compost the other day. An annual rite of spring and often fall, too, for many gardeners, turning the compost pile aerates the bin and speeds up decomposition. Built late last summer on a blindingly white hot day, we've steadily filled it with garden materials, kitchen waste, and a bag or two of leaves “stolen” after dark from our neighbors and from along a nearby bike path. (Thankfully, we weren't the only ones. Other bikers occasionally zoomed by in the dark precariously balancing big bags of leaves on their baskets. We all pretended not to notice each other, but it is always nice to see a kindred spirit.) Some of those leaves turned into mulch on the west wall bed, and some got thrown in the compost bin to balance out the mix of greens and browns. (Greens are a source of nitrogen for the critters snacking away, and the browns are a source of carbon. Both are required in some balance to keep the compost bin community happily eating, pooping, and reproducing.)

What we found was all I could have wished: a lively community of worms, insects, slugs, and other critters shocked at the sudden change in light, temperature, and space. I'm sure they didn't appreciate the unceremonious flop to a new spot via pitchfork, but it was clearly the highlight of my day. Seeing so much life there convinced me that I am on the right track in my little corner of the farm. These creatures don't just break down the things in the bin, they signify life and a healthy soil, which means hearty plants and a good harvest. It felt like Christmas with a little bit of Thanksgiving thrown in for good measure, but missing the fireworks of Hanabi in August and the Fourth of July.

After taking a few celebratory photos, we finished turning the contents. Once the new bin was filled to the brim, we gave it a good drink of water. It had rained the day before, so things were damp, but with the sun-washed day still heading for its peak temperatures, a sprinkle of fresh water would refresh and encourage my slimy neighbors to resume breaking things down in their new digs.

There was enough leaf and hummus mix left to spread a few buckets on one and a half beds being prepped for summer crops. More went on the west wall bed in a space vacated by the yacon. The results may or may not be interesting. The west wall bed is never tilled, and the easternmost bed is tilled at least twice a year. After spreading the compost, I covered both areas with the black plastic material used to mulch the most recent round of winter crops. The plastic should keep things from blowing or washing away, and it raise temperatures underneath a bit to encourage decomposition. Battened down with a rather unattractive mix of old bricks and assorted stakes, they will cook away until tilling time.

A number of worms and other critters went along in each bucketful, and I'm hopeful they'll settle in comfortably. I worry some about the impending tilling of the eastern bed as that is not always a welcome activity for my quiet, slimy friends, but my fingers are crossed that some will hang around. Meanwhile, the remaining compost is a bit too chunky to be spread at this time. The farmers worry in turn and rightly so, about large pieces of things being tilled into the beds. The work of breaking down those big chunks can tie up valuable resources vegetables need for growing, but at this moment my desire to build a better soil is greater than the one for a homegrown sweet, fat kaboucha for our first round of houtou udon in the fall.

Thursday, October 7, 2010

Squash Roots Resemble Knobby Spine

After harvesting the last of the squash and in preparation for the winter crops, I tidied up the beds. As I pulled out the squash roots, I was more than a bit shocked to see that they resembled a knobby spine. I'd seen this sort of thing before on the edamame and other legumes, but not elsewhere. The farmers were also quite shocked when I showed the roots to them, and said there was a problem in the soil.

Coincidentally, I've been reading up on soil. After all the conversations with Tomoe-san during our WWOOFing experience and talking with the farmers about preparing for planting, I decided I need to do a bit of studying. The book currently absorbing my attention is Teaming with Microbes: A Gardener's Guide to the Soil Food Web by Jeff Lowenfels and Wayne Lewis. So far it's pleasantly scientific - good information without being overwhelming - and very readable. I'm starting to see my garden in a new light. (I'm planning to write a review once I finish it.)

The problem, as far as I have been able to determine so far, is that nematodes attached themselves to the roots. Now, before I go further I want to clarify that not all nematodes are bad. The little fellows don't just chomp on roots, but eat bacteria, fungi, and other critters. Some varieties also transport bacteria and fungus while eating a microscopic handful in exchange and depositing the remains in the garden. Decomposing organic matter, mineralization of the soil, along with transporting bacteria and fungi to other parts of the garden are all in a days work. As they work along in collaboration with everyone else living in the soil, they tend to make it a better place.

Except when they decide to snack on plant roots. It's understandable, but not always appreciated. This branch of the nematode family is perhaps the most unwelcome for gardener's and farmers. A little research tells me that one of the most effective ways to get rid of them is to plant a grass crop, i.e. corn, the following year. The corn works as a trap crop (odd to think of that being underground rather than above!), and the little critters feast away. Marigolds in large numbers, it seems, also work as a trap crop above and below ground.

My plan for this portion of the garden at the moment is to plant my winter greens. My fingers are crossed that the little root chomping buggers will be hibernating or burrowing deep to escape the chill of the winter rains. Come summer I'll put in another round of popcorn (the aforementioned grass crop), and top it all up with healthy doses of compost from the bin. Perhaps I'll use this as an excuse to plant a row of marigolds merrily dancing down the center of the popcorn rows, too!

Sunday, October 3, 2010

Compost Bin and Lasagna Garden Update

I always think it is just so cool to watch a compost bin in action. When we first built this bin it was full to overflowing with popcorn stalks and weeds. I watered it almost daily to lend an assist to the decomposition process, and in the past couple weeks nature has also helped out. Regardless of the water, though, the height of the bin has dropped considerably. I shouldn't be surprised. After all, this is what is meant to happen; however, it still amazes me each time. (An old high school friend recently remarked on what an exciting life I lead, and I think I'm just giving him more evidence of that with this post!)

Even as I write this, the level has dropped again. After harvesting the squash and tossing in the vine remains, the top was taller than the cement wall behind. Yesterday when I dropped off our latest bucket of coffee grounds, nashi bits, eggshells, and salad skeletons it was lower still. (The aforementioned popcorn stalks are visible at the bottom of the bin in the photo above.) I can just imagine all the little nematodes, microbes, and other critters fattening up and pooping out the stuff my garden so ardently desires. It makes me pathetically happy.


The same holds true for the lasagna bed, too. The bed seems to be coalescing now into an organic mass, and the thick layer of newspaper below seems to be doing its job of holding down the weeds. I do want to bring in a couple more bags of composted manure to top it off some, and help hold the grass in place as winter approaches. I don't want to lose any of those precious greens bits, although I do worry a bit about too much nitrogen. My aphid experiences this summer make me a bit more cautious than before. Then the decision about what to plant comes - another favorite!

Monday, August 23, 2010

Lasagna Bed in Place

Right after constructing the compost bin on Sunday I also put together my first lasagna bed in the Tokyo garden. This past year I felt things in the garden were a bit lackluster. I know I keep saying that, but something is nagging at me about the whole set-up. My hunch is that I'm not quite tending to my soil the way I should.

We farm and grow here year round. Summer vegetables give way to winter vegetables give way to spring to summer again. It's a lovely thing to have all those winter greens to eat, but I feel my soil isn't getting a chance to rejuvenate properly. In Michigan I'd top the beds up with a good dose of horse manure (I've been saying what I'm really missing these days is a horse's ass...), straw, chicken coop leavings, a bit more straw, and head inside for a hot cup of tea and homemade bread from our friends at Ambry Farms.

Since the soil is getting worked so heavily and my supply of straw and manure is limited, I've decided to take things into my own hands a bit. The weeds cleared out from the edge, paths, and rows (yes, things got a bit out of hand over vacation in more ways than one) along with some corn husks and leaves replaced the straw, and the cow manure I purchased the other day made up for the horse's ass. A good thick layer of newspaper on the bottom, then thick poop, thick straw, poop, straw, and a topper of poop. I'd like to add a bit of woodash or its equivalent, but I'm not sure where to find that.

I'm trying to decide between two ideas for this space. The first has me letting it stew for about a month and then planting garlic cloves. The second has me letting it stew until spring and planting a nice bed of seedlings of some sort or another. We'll see what happens. (Suggestions welcome.)

Sunday, August 22, 2010

Compost Bin in Place

We finally built a compost bin. It's not a fancy affair by any means, but I think it will nicely do the job. Made of chicken wire and a few poles it sits in the back corner of the garden space. I filled it almost immediately with the tomato plants (a mishap during our Hokkaido vacation meant they didn't get picked and so the plants got the signal to stop producing fruits - nothing a good cry couldn't help with), chopped up corn stalks, squash vine trimmings, and a few random weeds. I topped it all off with some bits from our last couple meals - banana peels, egg shells, coffee grounds, and some squash innards - with a good watering to get things rolling. Come Spring I imagine I'll have a nice little bundle of hummus (not the kind eaten with tabouleh and pita, unfortunately) to start spreading around.

(Apologies for the quality of the photo. Taken a little before noon the heat and light were a bit intense, as you can tell by the look on my face.)

Wednesday, August 4, 2010

Compost Tea


A little more than half-way through the season (give or take) the balcony plants could use a bit of a snack. When I potted them up this spring I set them in a mix of compost, potting soil, and composted-dried cow manure. (And as I mentioned for the green curtain, if I had to do it over again I would add a nice dose of calcium for added strength.) They've grown along merrily enough, but to keep them feeling flush with green and hearty in the face of the summer heat and wind I whipped up a batch of compost tea.

A favorite garden beverage it's easy to make. My recipe, as always, is a bit fast and loose. I take a large container, fill it with a few inches of compost, fill it with water to the near brim, and leave it to steep like sun tea. In Michigan, I used compost straight from the bin for that season, but in Tokyo I simply threw some from the bag in a jar, added a bit of leftover cow manure, and filled it with water. No cover so it could breathe and bubble to its heart's content for about a week.

This morning while watering I added a bit to the watering jug, and filled that the rest of the way with water. I carried on with that process until I got down to the sludge. Once there, I added a bit of fresh material, refilled the jar with water, and have left it to sit again.

The mix is not so strong as to burn the plants, but it should give them a nice lift. I'd like to experiment with different combinations and hope to eventually move to a larger container so I can feed all of my plants on the same day. Or, now that I think about it, I could just get more than one jar...

Thursday, June 10, 2010

The Comploo: A Gardener's Dream


I adore compost. It's my personal cure-all for whatever ails in my garden. The bucket on the counter turns into all that my plants need to grow well to feed my household. Vegetable and fruit castoffs return to the bucket to return to the bin and then to the garden again. Tea bags, yard waste, garden leavings, and kitchen scraps all go in and come out as plant-scrumptious humus. (The kind eaten indirectly rather than the other garlic-laden delight.)

One of my greatest challenges here in Japan is gardening without it. I'm accustomed to turning a pile as well as digging into it when I need some of that lovely black gold to put in a pot or add to a bed. I've got permission to build one, and I'm in the process of choosing a site. Meanwhile, I bury it in spots around the garden as I can and hope for the best.

That said, Bakoko's little creation - The Comploo - is something near to a dream come true for me. Taking advantage of the heat produced during the composting process, the Comploo is a sweet little building that I can easily imagine tucked somewhere near my garden as a perfect spot to take a bit of a break between work rounds. Or a cozy place on a rainy afternoon where I could see the garden, plot new plantings, or just bask in the glow of all those vegetables I adore. Heated by food, garden, and yard scraps composting merrily away in bins that round the edges when I'm done plotting, viewing, and basking I'll just open a bin to scoop some of that wonderful stuff out.


Perfect especially for a community garden, park or a cafe growing the majority of it's food out the back door, the Comploo creates a space for gathering that takes advantage of plant materials in place. Talk about a great way to warm people up to the idea of their own composting after touring the vegetable patch to see what's in season!

Sunday, January 4, 2009

Cowboy Poetry and the Afterlife

We haven't owned a television for just over thirteen years, so it's fairly easy to guess that I'm an avid NPR listener. Thankfully, we have two stations in our area - WUOM for talking my ear off and WEMU for some of the best music around - to satisfy whatever my need is for audio input at that moment.

My morning coffee is often shared with one of those local stations, two cats, and a woodstove. This Saturday was no different, and we joined Bob Edwards as he was interviewing Wally McRae, cowboy poet. Long-time fans of Baxter Black our ears were ready for words on the range, and McRae did not disapoint. Funny, thought-provoking, and powerful all other noise stopped as we listened to him recite Things of Intrinsic Worth and Reincarnation, my personal favorite of the morning.

Reincarnation with a touch of humour for the first time made me feel, for lack of a nicer way of puting it, better about death. It made me think of Beau Jacque, one of our first chickens to die. We buried her in the garden with a little ceremony and some words of thanks. Then we planted tomatoes there and a sage bush. She's still part of the action. Similarily, our compost bucket and bin make me feel a wee bit better about fruits or veggies that get lost in the back of the fridge or bottom of the bowl. Really, it's no loss. They come back in full force in the garden later as compost that fortifies the popcorn, the beans, or the kale. And that in turn fortifies us. It's like getting a rebate but without the hassle of sending in your proof of purchase.

For the first time, I know how I'd like to be put away at the end of my day. I'd like to be planted somewhere and have things growing above me. Not grass that gets mowed (boring and against what I believe in), but perhaps prairie plants or an oak tree that offer food and shelter to wild things large and small. Or a vegetabe patch, although that might gross out the living, but I can think of nothing that would be better. I'd still be helpful to others, maybe even friends and family. How nice is that to think about? That might just be heaven for me.

Thursday, January 31, 2008

Salad in a Pot

Our garden is rather small. We have a fair amount of yard, most of which we don't mow, but our garden is comparatively tiny for folks living out in the country. I pack it, of course, with more vegetables, flowers, and herbs than perhaps I should. I like the bountiful feeling of green paired with all those blooms leaping everywhere, along with the fantastic number of things I get to harvest. The garden feels so incredibly alive to me (bees, butterflies, birds, cats, and chickens at the gate!) that I don't mind the balancing act to get that one last ripe tomato.

Despite this, our garden still feels somewhat small to me, and in the spring I find it hard to resist planting MORE! Our neighbors over at Frog Holler Organic Farm sell seedlings in the spring, and I simply can't resist. I always pick up too many to fit in the beds.

This past summer was no different. So, I came up with a new idea for my garden. Pots!

I filled pots with a mix of composted horse manure and compost from our bins. Then I threw in flowers (sometimes edible, sometimes not), spare lettuce or kale or chard, herbs like parsley or basil, mulched with straw, and set them out.

Ta-dah! Within moments my spare plants had a home, more salad was in future, and I'd expanded my garden space quite simply. Plus, the pots were easy to bring into the porch when the weather got chilly extending the season for fresh herbs quite some time. Hooray!


Sunday, January 6, 2008

Fertile Thoughts


I've just been reading some great posts on composting at Gardening Anywhere, and thought they were worth pointing others toward.

Composting always seems intimidating to newcomers to the idea, at least it was for me, but once I got going there was no turning back. We have two bins down by our garden. One is the one in use (where we empty the compost bucket under our counter every day or so), and the other is the one settling and manufacturing the tasty treats my 2008 garden will delight in so very much. We throw in all kitchen waste with the exception of meat and dairy stuff. Tea bags, coffee grounds and filters, egg shells, tofu that's gone bad, etc., all lands there. If the chickens don't eat it first (hard to tell our girls no when they look so picturesque on top of the pile and when I know their leavings are as good as gold, too), it breaks down with the leaves and grass clippings I plopped there over the summer and fall.

Ours are built out of old wood palettes - one on the back and two for sides - with boards that we attach to the front to hold things in as the pile grows. We don't do anything fancy except rotate the piles in the spring, and I put in a perennial bed on the side closest to the garden. Native plants - common milkweed, yarrow, blanket flower, and butterfly weed - should keep the beneficials happy for the season.

I wouldn't trade our compost bins and the goodies they produce for anything. Chemicals - fertilizers, herbicides, and pesticides - negatively impact my garden, soil, and water not to mention the beneficial critters I count on to help my tomatoes grow and my zinnias bloom. Not to mention the negative impact on my pocketbook when my kitchen scraps and lawn bits are either free or make my investment at the grocery store and farmer's market go that much further.

How to do it? It seems like there are a million and one ways to make compost bins, the majority of which are incredibly easy. Purchasing one is fine, too, but not really necessary, if you ask me. Once upon a time, I thought it was the only possible way to have one, but it really could be as simple as just making a pile. Check out the books listed here and see what they suggest.