 |
| Smashed beans, or how I made my own miso. |
Our first year here in Japan was full of food-making adventures: umeboshi, sashimi, umeshu, and kimchi. It was all good fun and led to a whole variety of other experiments. We now have what we call a Shu Closet, where we keep the many jars of fruit shus I've made over the years plus an occasional brandy concoction and umehachimitsu, a lovely non-alcoholic beverage perfect hot or cold.
Yet, the experiment that I've delayed out of a certain sense of intimidation is miso. A friend of the farmers stopped at the farm one day and offered a sample of some he'd made. It was chunky and yeasty smelling, and super delicious. It was amazing.
 |
| Daizu waiting to meet the koji and salt. |
Flash forward four years, to a recent Earth Day Farmers Market I stopped at Yamamoto Farm's table as usual in search of their homemade mochi and miso. There to my pleasant surprise were bags of daizu and koji with salt. Without hesitation, I snapped them up and Yamamoto-san gave me detailed instructions on what to do. Giddy, I headed home with my loot and got to work.
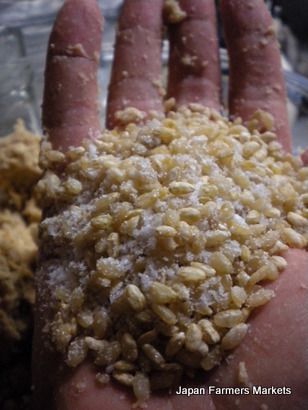 |
| Koji and salt simply waiting to meet the beans. |
1 kilogram soy beans.
1 kilogram of koji-infused rice and salt
- Soak the beans.
- Boil the beans.
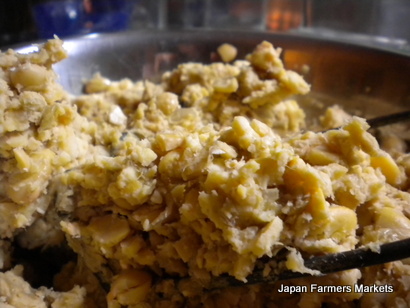
- Drain and smash.
For smashing, I used an antique potato masher I'd purchased at an antique store in my hometown. Originally destined to help make jam, it worked like a charm on the beans. The texture proved rather chunky, though. I like it that way, but others may desire something smoother. A food processor or more time with the hand masher would do the trick.
- Add the koji and salt.
I'll never forget opening that bag of koji. The smell that emerged was yeasty and wonderful, putting me in mind of my bread-making days in America or peeking at my mother's coffeecake dough as it magically rose under a dishtowel in a corner of the kitchen. Pure joy and a connection with so many parts of the past and this new culture is what I felt right then. Even if my miso fails, this moment alone was totally worth it.
Koji is the yeast that gets busy fermenting and turning the daizu into miso or rice into sake. Word has it that it also makes a mean pickle. Its most common form is as koji-infused rice, which is how Yamamoto Farm sold it. I simply filled a cup or two, poured it over the smashed beans, and started mixing it, literally, by hand.
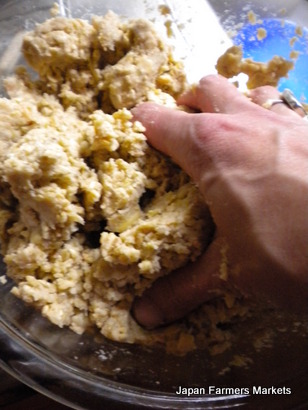 |
| Hand-mixing! |
As I worked the mixture in my hands I could feel the bits of beans that hadn't been completely smashed, and the grains of koji. It reminded me of kneading bread dough, a sort of meditative process that resulted in a warm feeling and a tasty treat to share with others.
- Salt the jar.
Katz recommends coating the bottom and sides of the miso container (a ceramic, glass or plastic bucket or jar) with salt to help the fermentation process. As it does with sauerkraut and umeboshi, the salt draws fluid out of the beans and creates a brine that flavors and preserves the miso.
- Place miso in jar and cover.
Once the jar was properly salted, I took great handfuls of the miso and placed it inside. I smashed it down tightly to remove any air bubbles and to make sure it would all fit. Once everything was in I put another layer of salt on the top and then added a weight. Yamamoto-san suggested a weight that was only ten-percent of the total amount. Katz doesn't suggest such a requirement. Both, however, do agree that the entire surface of the miso should be covered to ensure the best fermentation process.
- Wait.
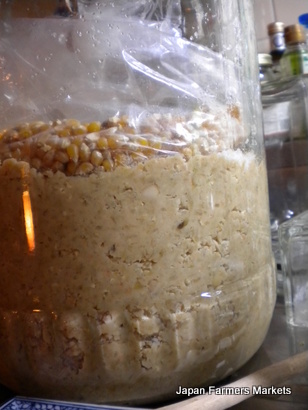 |
| My first miso, not perfect, but ready to ferment. |
Comments
Martin Frid